If you’re looking to make wine, it’s actually quite easy to get started with wine recipe kits. Using wine kits is the best place to start your wine making journey because kits simplify the wine making process from grape to glass. Wine kits allow you to create amazing wine with much less wine making equipment and work. Here we provide a brief rundown of what you need to make wine, get it into bottles, and finally start your own cellar at home. This is a general guide, so be sure to refer to the instructions included with your specific wine recipe kit. Each wine kit process is different and may have unique steps. Please read all steps before starting the wine making process.
Wine making can be broken down into 5 easy steps:
- Preparation
- Primary Fermentation
- Secondary Fermentation
- Clarifying and Stabilizing
- Bottling
Step 1: Preparation
This is a basic list of equipment you will need on your winemaking journey. Just like any other hobby, there are additional items and upgrades that can make life easier. The list we have prepared here is for a 6 gallon batch of wine, the most commonly used size in home winemaking equipment and wine making starter kits. Further, most wine recipe kits will produce 6 gallons of finished wine so it’s a good idea to get equipment to accommodate that volume. The Master Vintner wine making starter kits are an easy way to collect the gear you will need to start your winemaking journey.
Supplies You Will Need for Wine Making:
Primary Fermenter - 6.5 gallons or larger. 7.9 gallon plastic fermenters with a lid and airlock work great and allow for the use of grape skins featured in some of the full bodied red wines.
Secondary Fermenter - 6 gallons with a narrow neck (the narrow neck is important as it helps to prevent oxidation. We’ll cover that in detail below). We prefer glass carboys, but plastic carboys also work if you prefer a lighter, more flexible material.
Bung and Airlock for Carboy - These protect the wine in the fermenter from outside elements such as fruit flies or bacteria while also allowing CO2 from the fermentation process to escape.
Siphon and Tubing - A standard auto siphon with vinyl tubing works great but requires gravity. Our self-priming transfer pump kit can move wine without requiring gravity or lifting heavy carboys full of wine.
Corker - There are several options out there ranging from hand corkers to heavy duty Italian floor corkers. If you plan to age your wine for an extended period (2 years or more), you may want to consider a floor corker as it will allow you to use a larger diameter cork that will hold up during extended cellaring. The Portuguese floor corker is a very popular option among our wine makers.
30 Wine Bottles and Corks - Wine bottle neck sizes are universal as long as the bottles are designed to accept a cork. Do not try to cork a bottle designed for a screw cap, it will not go well. As mentioned above, if you plan to age your wine for more than 2 years, #9 corks will give you the best performance, but they do require a floor corker to insert them into the bottle. If you plan to use a hand corker, we recommend using the smaller diameter #8 corks.
Spoon - A standard food grade tool to mix wine ingredients. Wooden spoons should not be used for winemaking as the surface is porous and can hide bacteria.
Degassing Tool - This is meant to agitate the wine and release the naturally occurring CO2 that forms during alcohol fermentation. These tools are usually designed to be used on a handheld drill.
Bottle Filler - A unique and very handy tool that shuts off the flow of wine as you switch from one bottle to the next. It also has the added benefit of displacing the perfect amount of wine in your bottle leaving the perfect amount of headspace in the bottle after you remove it.
Wine Recipe Kit - Wine kits generally contain condensed grape juice for shelf stability and transportation. Be sure whichever kit you choose will produce a finished batch size of 6 gallons (23 liters) or prepare accordingly for a different batch size.

Step 2: Primary Fermentation
The first thing to do before any of these wine making steps is to thoroughly clean and sanitize your equipment. Next, check the directions provided with your wine kit and take an inventory. Are all of the ingredients included? If so, the next step will be to sort out the ingredients to be used for primary fermentation and those to be used for secondary fermentation.
IMPORTANT NOTE - Pay close attention to which ingredients you are adding during this first step. Not all of the packets should be added at this time. In fact, doing so can ruin your wine! Ingredients such as sulphite, sorbate, clarifiers, and finishing or sweetening packs will be used later in the process after primary fermentation has completed.
Clean and sanitize the following equipment:
- Primary Fermenter (Bucket, Carboy or Big Mouth Bubbler)
- Airlock
- Hydrometer
- Spoon
After everything is cleaned and sanitized, you’re ready to begin.
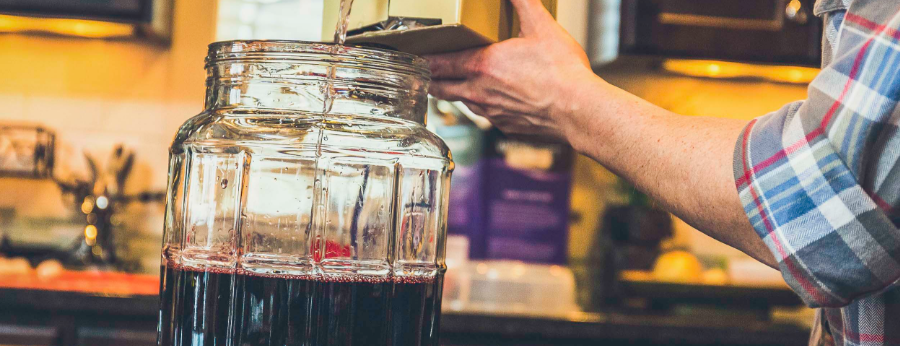
- Fill your fermenter with a half-gallon of warm water
- Add the package of bentonite from your wine recipe kit and gently stir until dissolved
- Pour in the large bag of grape juice concentrate
- Add water to reach 6 gallons of total liquid in the fermenter
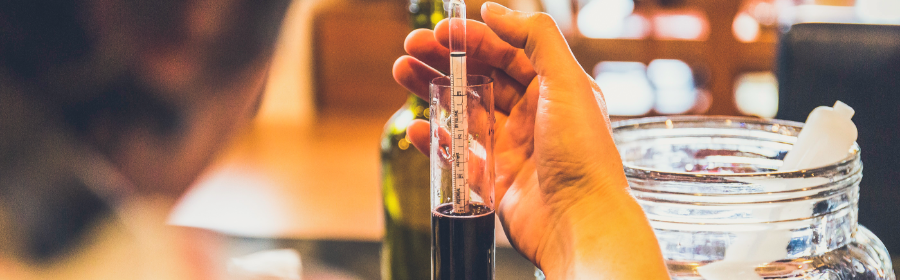
- Take a gravity reading with your hydrometer and make sure the reading is in the range specified in your recipe kit and record for future reference.
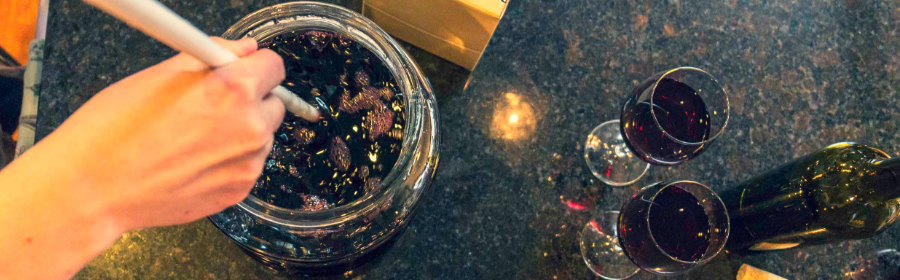
NOTE - Your wine kit may come with some additional ingredients that need to be added at this time. These ingredients may include items such as grape skins or oak chips. If your kit includes those, add them now. Please note these additional items should be added AFTER you have filled your fermenter to the 6 gallon mark with must and taken your gravity reading. (Must is the term for unfermented grape juice in your fermenter. The must may contain grape skins, seeds, and stems.)
- Open the yeast package, and sprinkle it on top of the must. No need to stir in the yeast, it will start moving on its own.
- Seal the fermenter with the lid, insert the airlock, then add water to the fill line on the airlock.
Set the fermenter in a place that will have a consistent temperature of 65º-75ºF. You should see signs of fermentation in the airlock in 24-48 hours.

Step 3: Secondary Fermentation
Clean and sanitize the following equipment:
- Auto-siphon
- Tubing
- Secondary fermenter
- Bung
- Airlock
- Hydrometer
Once your equipment is cleaned and sanitized, you can begin.
After 7 days in the primary fermenter, test the gravity of the wine with your sanitized hydrometer. If the gravity reading is 1.010 or below, proceed to the next step. If the reading is still above this mark, wait a couple of days and test again. Do not proceed to the next step until your gravity has reached this mark.
Use the siphon and tubing to transfer your wine from the primary fermenter to a carboy, or secondary fermenter, leaving the sediment on the bottom of the primary fermenter behind.
NOTE - Some kits call for additional ingredients such as oak cubes to be added to the secondary fermenter at this time. Read your instructions carefully and if your kit calls for them add them now.
Seal the secondary fermenter with the bung and airlock then add water to the fill line on the airlock.
Step 4: Clarifying & Stabilizing
Clean and sanitize the following equipment:
- Hydrometer
- Wine Degassing Tool
- Liquid Measuring Cup
- Take another gravity reading. If your specific gravity is 0.996 or less, it’s time to move to the next step. If your gravity is still above 0.996, wait a couple of days and retest before proceeding.
- Using a drill mounted degassing tool agitate the wine to drive off CO2. The goal here is to agitate the wine and drive off CO2, not to spin it into a cyclone. If done correctly, there should be bubbles and potentially some foam rising to the top of the carboy. Continue this process for about 5 minutes. NOTE: CO2 is a natural byproduct of fermentation and while those bubbles are pleasant in beer, they are not ideal for our wine. CO2 in wine can prevent it from clearing and lead to problems during storage.
PRO TIP - CO2 is released easier at warmer temperatures so keep your carboy in a warmer location prior to degassing for the best results.
After releasing the CO2, you will want to protect the wine from oxidation. You can do this one of two ways.
- The first method is to add additional wine of a similar type to the carboy until the wine level reaches the narrowed portion of the carboy neck. Don’t worry, you will get this wine back when you bottle.
- The other option is to add inert gas like Private Preserve which is more dense than air and will sit on top of the wine surface like a blanket protecting your wine from oxidation.
Next Steps:
- In ½ cup of water, stir in the sulphite pack and the sorbate pack. Once mixed in add it gently to the wine.
- If your kit comes with a sweetening pack, add that now.
- Next clarify the wine by adding the provided clarifying pack. Some kits have one clarifier, others have two. If your kit has two clarifiers, be sure to add them in the order outlined in the kit.
- Attach the airlock and bung to the carboy
- Wait about 14 days for the wine to clear before moving to the next step.
Step 5: Bottling
Clean and sanitize the following equipment:
- 30 Wine Bottles
- Auto-Siphon
- Tubing
- Bottle Filler
You will also need 30 wine corks. Do not soak the corks because it may compromise the binding agent holding the cork together.
Once the wine has cleared, usually in about 14 days, it’s time to bottle.
- Assemble your auto-siphon and attach the bottle filler to the end of your siphon tubing.
- Place the auto-siphon in the carboy and the bottle filler in the first wine bottle. Be sure to keep the siphon above the sediment at the bottom of the carboy.
PRO TIP - To avoid stirring up sediment from the bottom of the carboy use a siphon clamp to hold the siphon in place while you bottle.
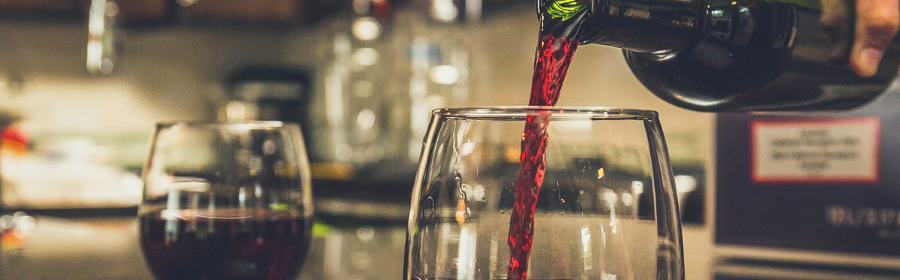
- Pump the siphon to begin transferring wine to the bottles. Once the wine reaches the top of the bottle, lift up on the bottle filler. This will stop the flow of wine and leave the perfect amount of headspace in the bottle for a cork.
- Insert the cork with your corker and congratulations, you’ve just made wine!
- Repeat this process for the remaining bottles.
- Store your bottles upright for two days, then store them on their side until you’re ready to enjoy!